最近稍微比较有空,突然想到过往开发的业务中对于类似
Element-Plus 的 Affix的逻辑很少进行封装,起兴看了下Element-Plus Affix的源码进行学习,以下是对Affix组件进行解析并逐步实现,觉得有兴a趣的JYM建议开个项目一起动起来
Tip: 文中的 vue api 就不进行讲解了,想必大佬们都看过vue官方文档了
通过本文章的逐步实现,希望你能够了解到:
- 如何通过
Vue3+VueUse实现一个Affix固钉组件 - 看懂element-plus affix组件代码
什么是Affix固钉
Affix 是通过滚动时对目标元素进行判断是否即将离开可视区域,当即将离开可视区域时将目标元素固定在特定可视区域
属性列表
以下是element-plus官方提供的属性列表,在这里我们着重讲解offset, position, target, z-index四个参数和其他几个api在整个组件中的实现
| 名称 | 说明 | 类型 | 默认值 |
|---|---|---|---|
offset | 偏移距离 | number | 0 |
position | 位置 | top | bottom | top |
target | 指定容器 (CSS 选择器) | string | — |
z-index | z-index | number | 100 |
Tip: 每个阶段的实现都会在我提交的github的不同分支,可以切换分支查看代码
本功能使用到@vueuse/core的api
pnpm i @vueuse/core
- useElementBounding [获取元素的位置和长宽信息]
- useWindowSize [获取窗口的宽高信息]
- useEventListener [注册事件监听]
基础版本
template
<template>
  <div class="affix" ref="root" :style="rootStyle">
    <div class="affix-content" :class="{ fixed }" :style="affixStyle">
      <slot></slot>
    </div>
  </div>
</template>
script
整体大致逻辑分为以下步骤
一. 定义获取目标元素及其目标元素信息,滚动容器,fixed状态
import { useElementBounding } from "@vueuse/core";
// 目标元素
const root = shallowRef<HTMLElement>();
const fixed = ref(false)
// 目标元素信息
const {
    height: rootHeight,
    width: rootWidth,
    top: rootTop,
    bottom: rootBottom,
    update: updateRoot,
} = useElementBounding(root);
// 滚动容器
const scrollContainer = shallowRef<HTMLElement | Window>();
二. onMounted阶段设置scrollContainer滚动容器,更新root目标元素的信息
onMounted(() => {
  // 我们先以window作为滚动容器
  scrollContainer.value = window
  // 更新root的信息
  updateRoot()
})
三. 使用 watchEffect(update) 更新fixed的状态(通过依赖目标元素rootTop变更,对fixed状态进行设置)
const update = () => {
  if (!scrollContainer.value) return
  // 这里可以看到,我们根据当目标元素root的位置信息top < 0 判断是否将离开窗口而进行fixed
  fixed.value = rootTop.value <= 0
}
watchEffect(update)
四. 设置元素的样式信息
按照我们的template写法,我们要理解下几点内容:
- 外部传入的
slot内容最后时,作为fixed的内容通过div.affix-content进行包裹使得<slot />能够脱离文档流 div.affix是为了当div.affix-content被fixed时,div.affix依然没有脱离文档流,但因为div.affix-content的脱离文档会导致是会坍缩,所以需要对div.affix设置宽高会保证滚动到fixed阶段时其他内容不会有闪动bug
const rootStyle = computed<CSSProperties>(() => {
  return {
    width: fixed.value ? `${rootWidth.value}px` : '',
    height: fixed.value ? `${rootHeight.value}px` : '',
  }
})
const affixStyle = computed<CSSProperties>(() => {
  if (!fixed.value) return {}
  return {
    width: `${rootWidth.value}px`,
    height: `${rootHeight.value}px`,
    top: `${props.offset}px`,
  }
})
css
.fixed {
  position: fixed;
}
完成之后你就可以运行一个基础版本的affix,但想必这功能还不够,只能将其紧贴着页面顶部,接下来我们继续趁热打铁,追加offset参数
参数
✨ offset参数
我们发现实现的基础版本只是通过rootTop.value <= 0进行判断是否固定,而如果想有一定的偏移量,还需要拓展一下,接下来我们定义可从外部传入offset
const props = withDefaults(
  defineProps<{
    offset?: number
  }>(),
  { offset: 0 },
)
目前我们的update方法中固定写死了fixed.value=rootTop <= 0的逻辑,现在我们调整一下逻辑:
const update = () => {
  // - fixed.value = rootTop.value <= 0
  // 更新成下面的代码
  fixed.value = props.offset >= rootTop.value
}
✨ z-index参数
z-index参数比较简单只需通过外部传入,设置到fixed的元素即可
const props = withDefaults(
  defineProps<{
    offset?: number
    zIndex?: number
  }>(),
  { offset: 0, zIndex: 100 },
)
const affixStyle = computed<CSSProperties>(() => {
  // ...
  return {
    // ...
    zIndex: props.zIndex,
  }
})
以上就完成了基础版本+offset+zIndex参数的实现,具体代码可以查看 base-offset-zIndex分支
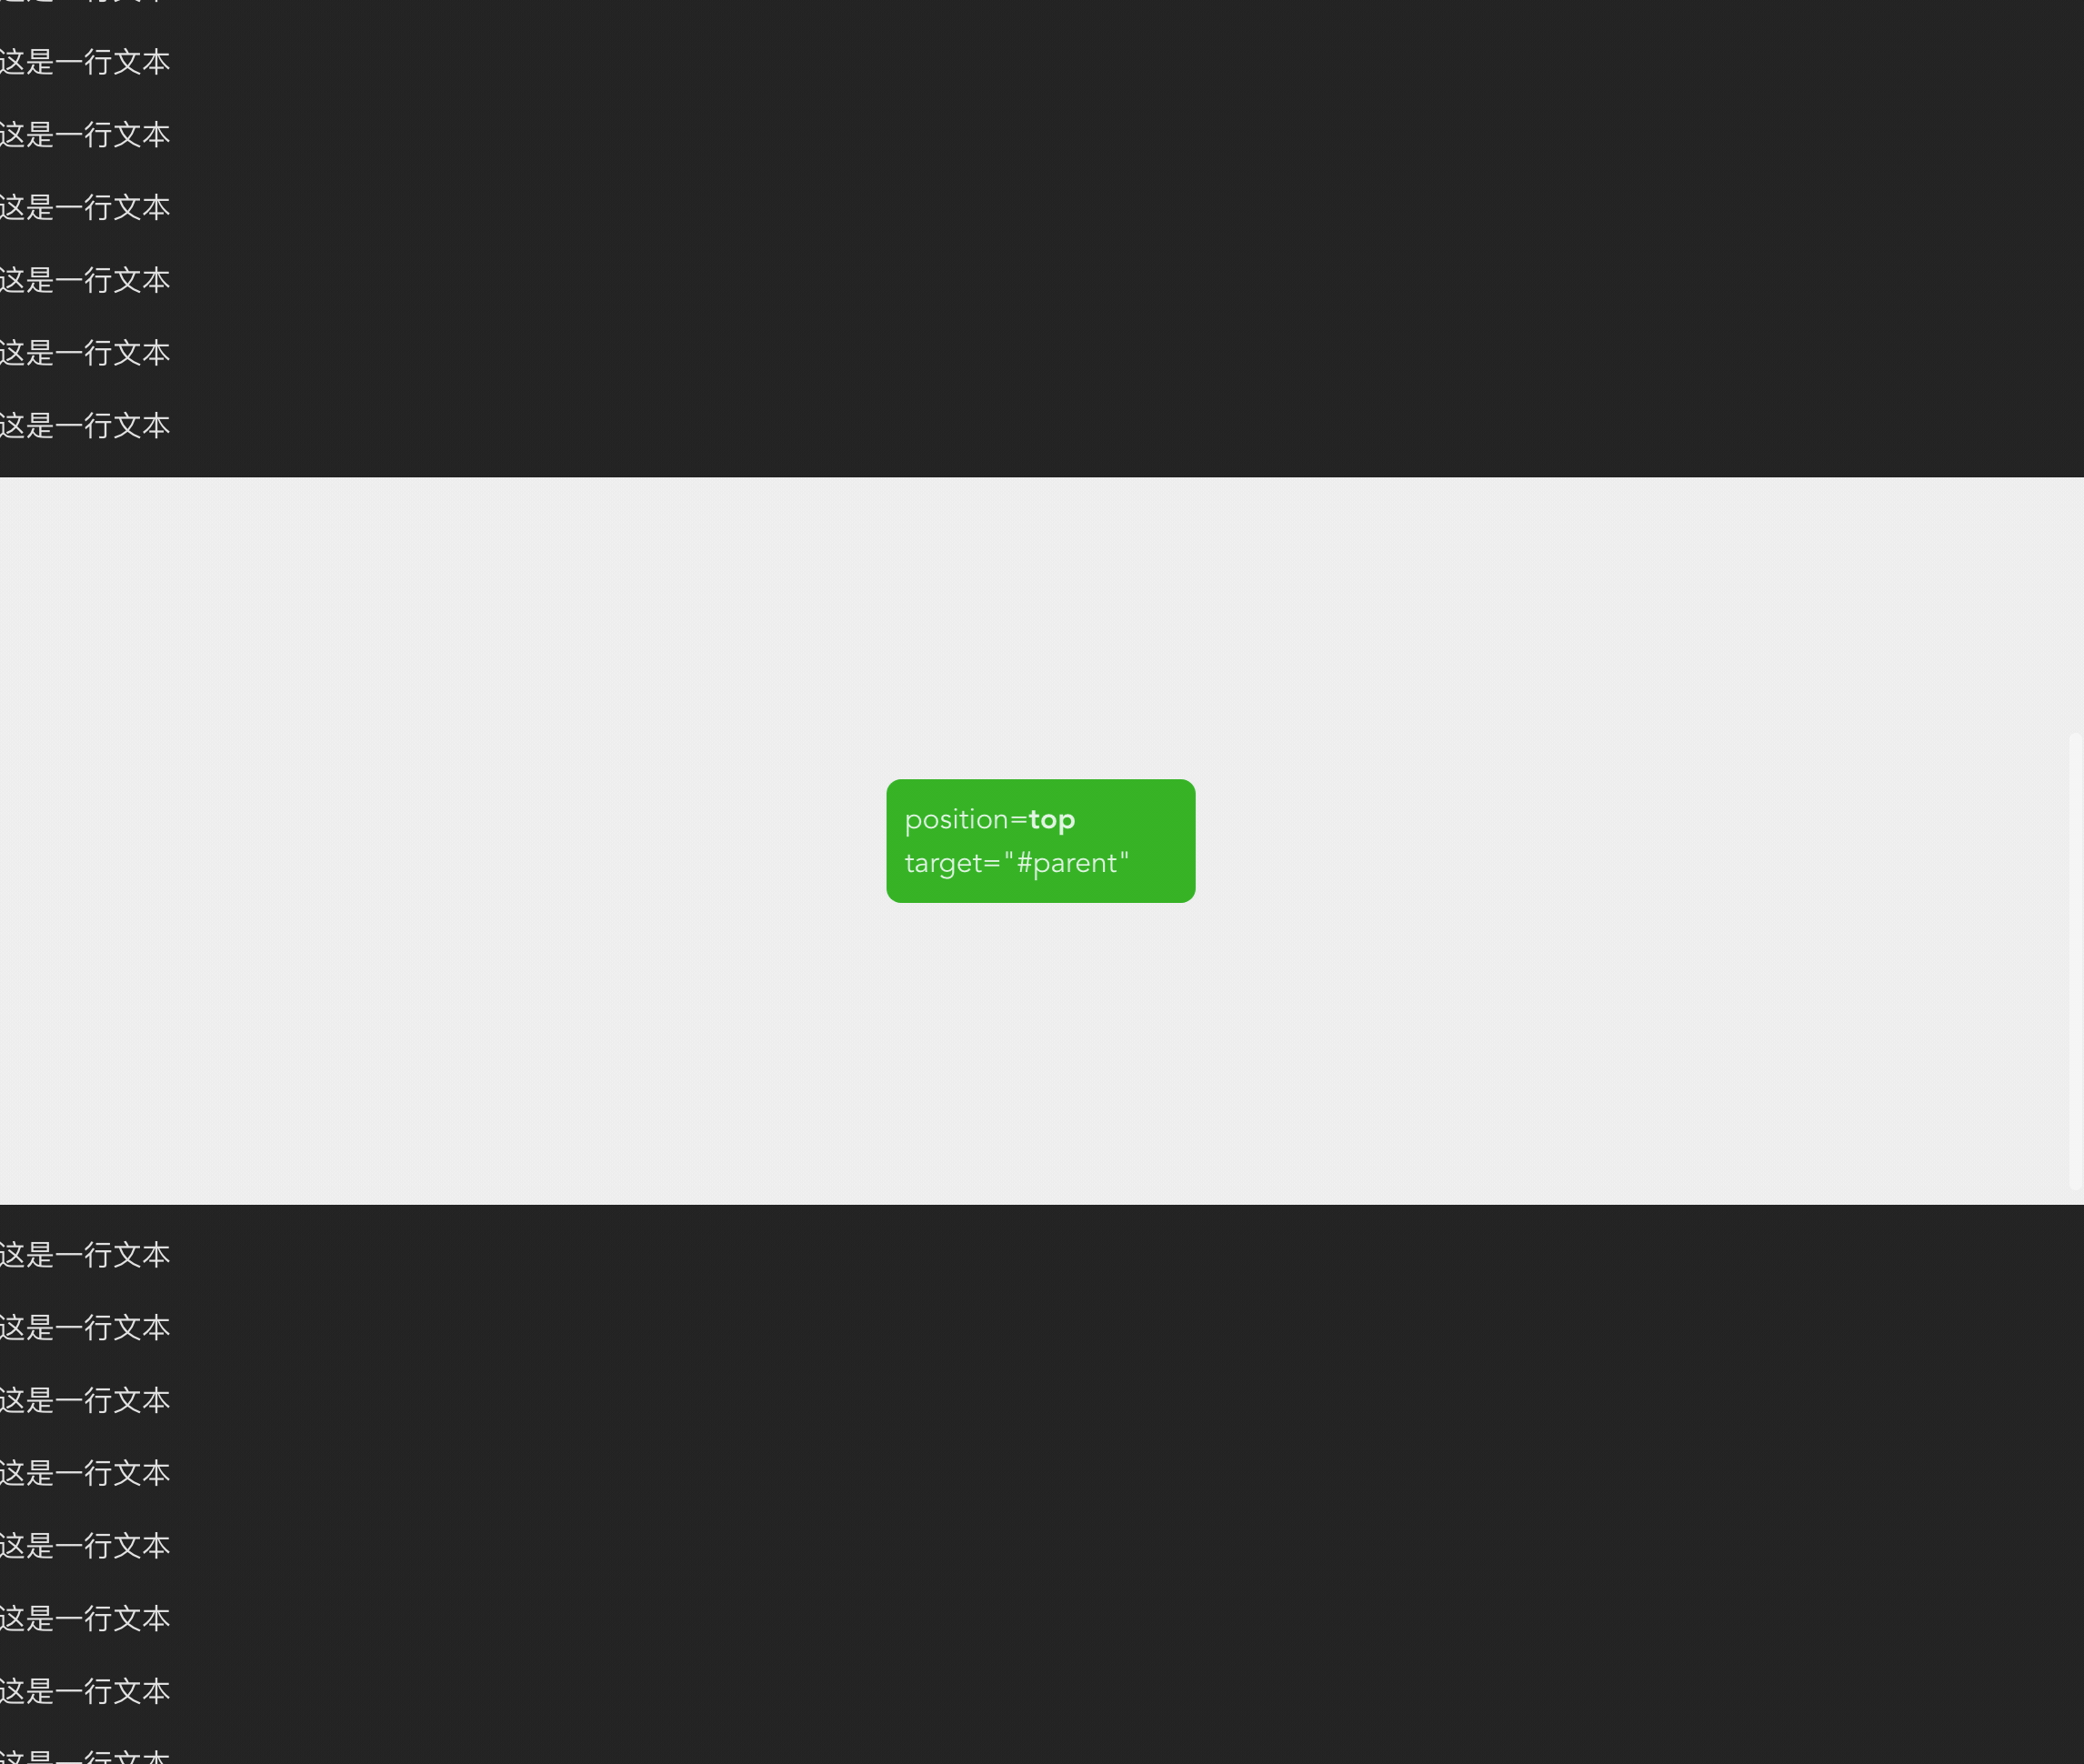
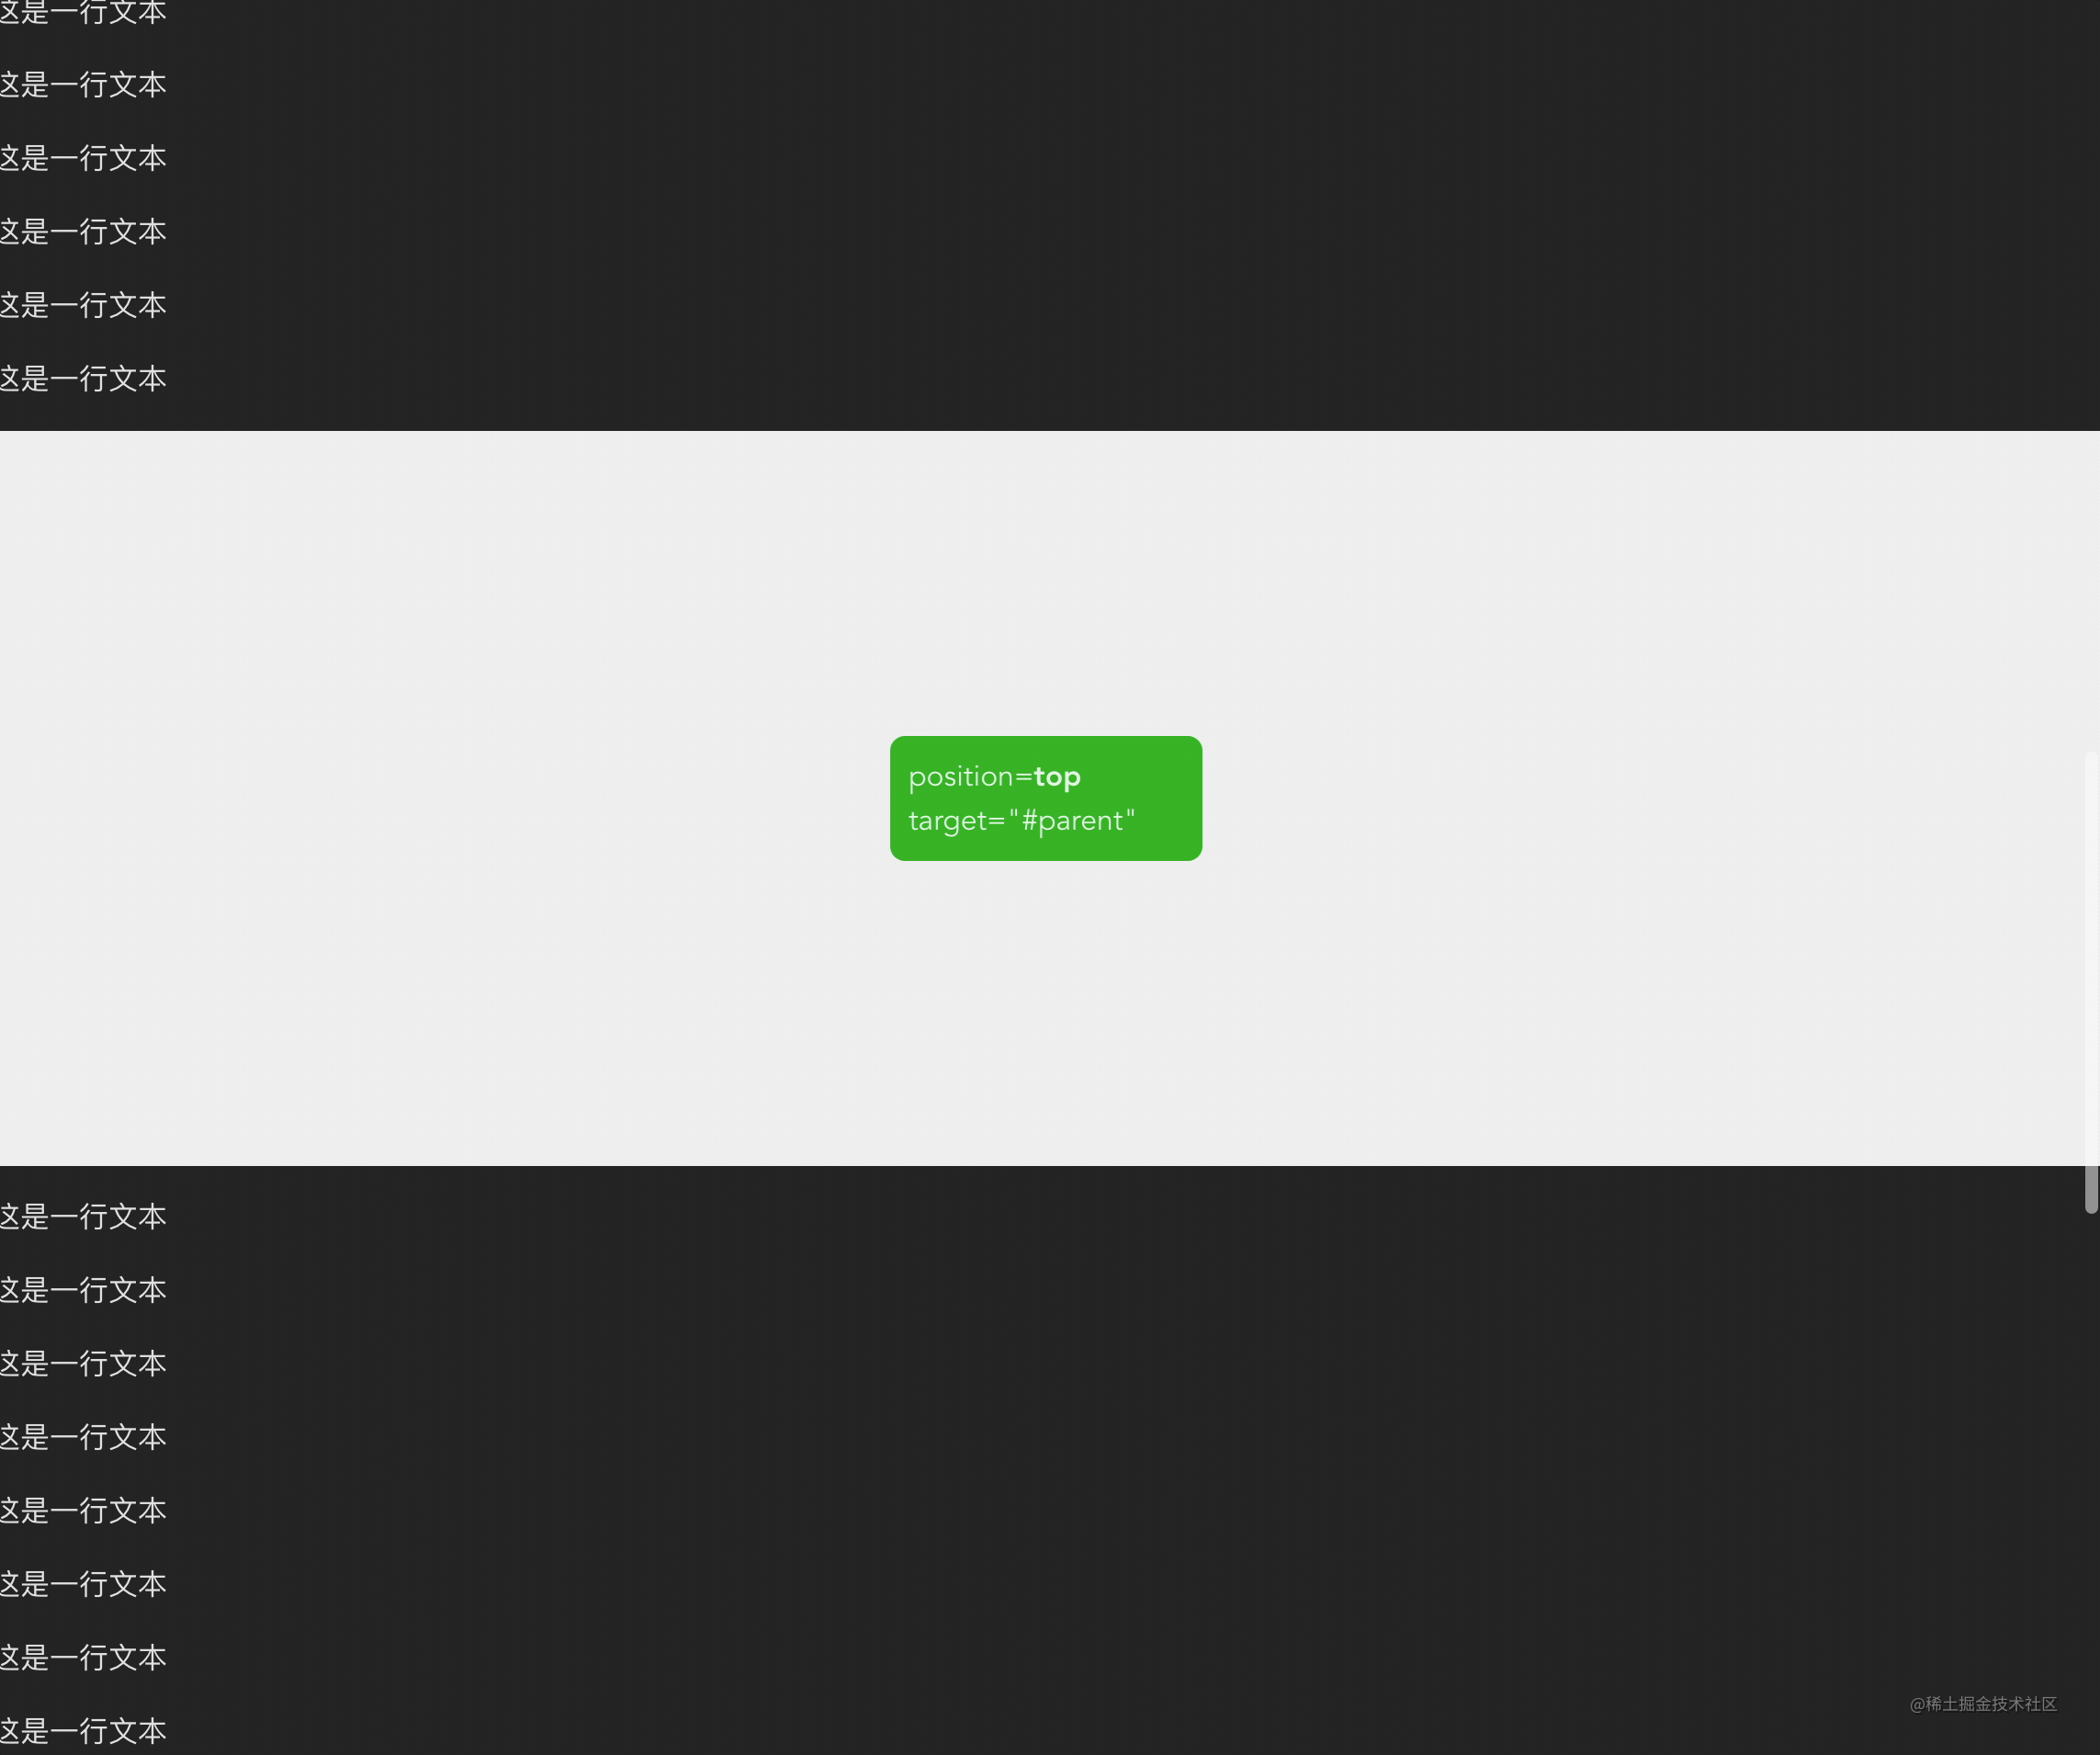
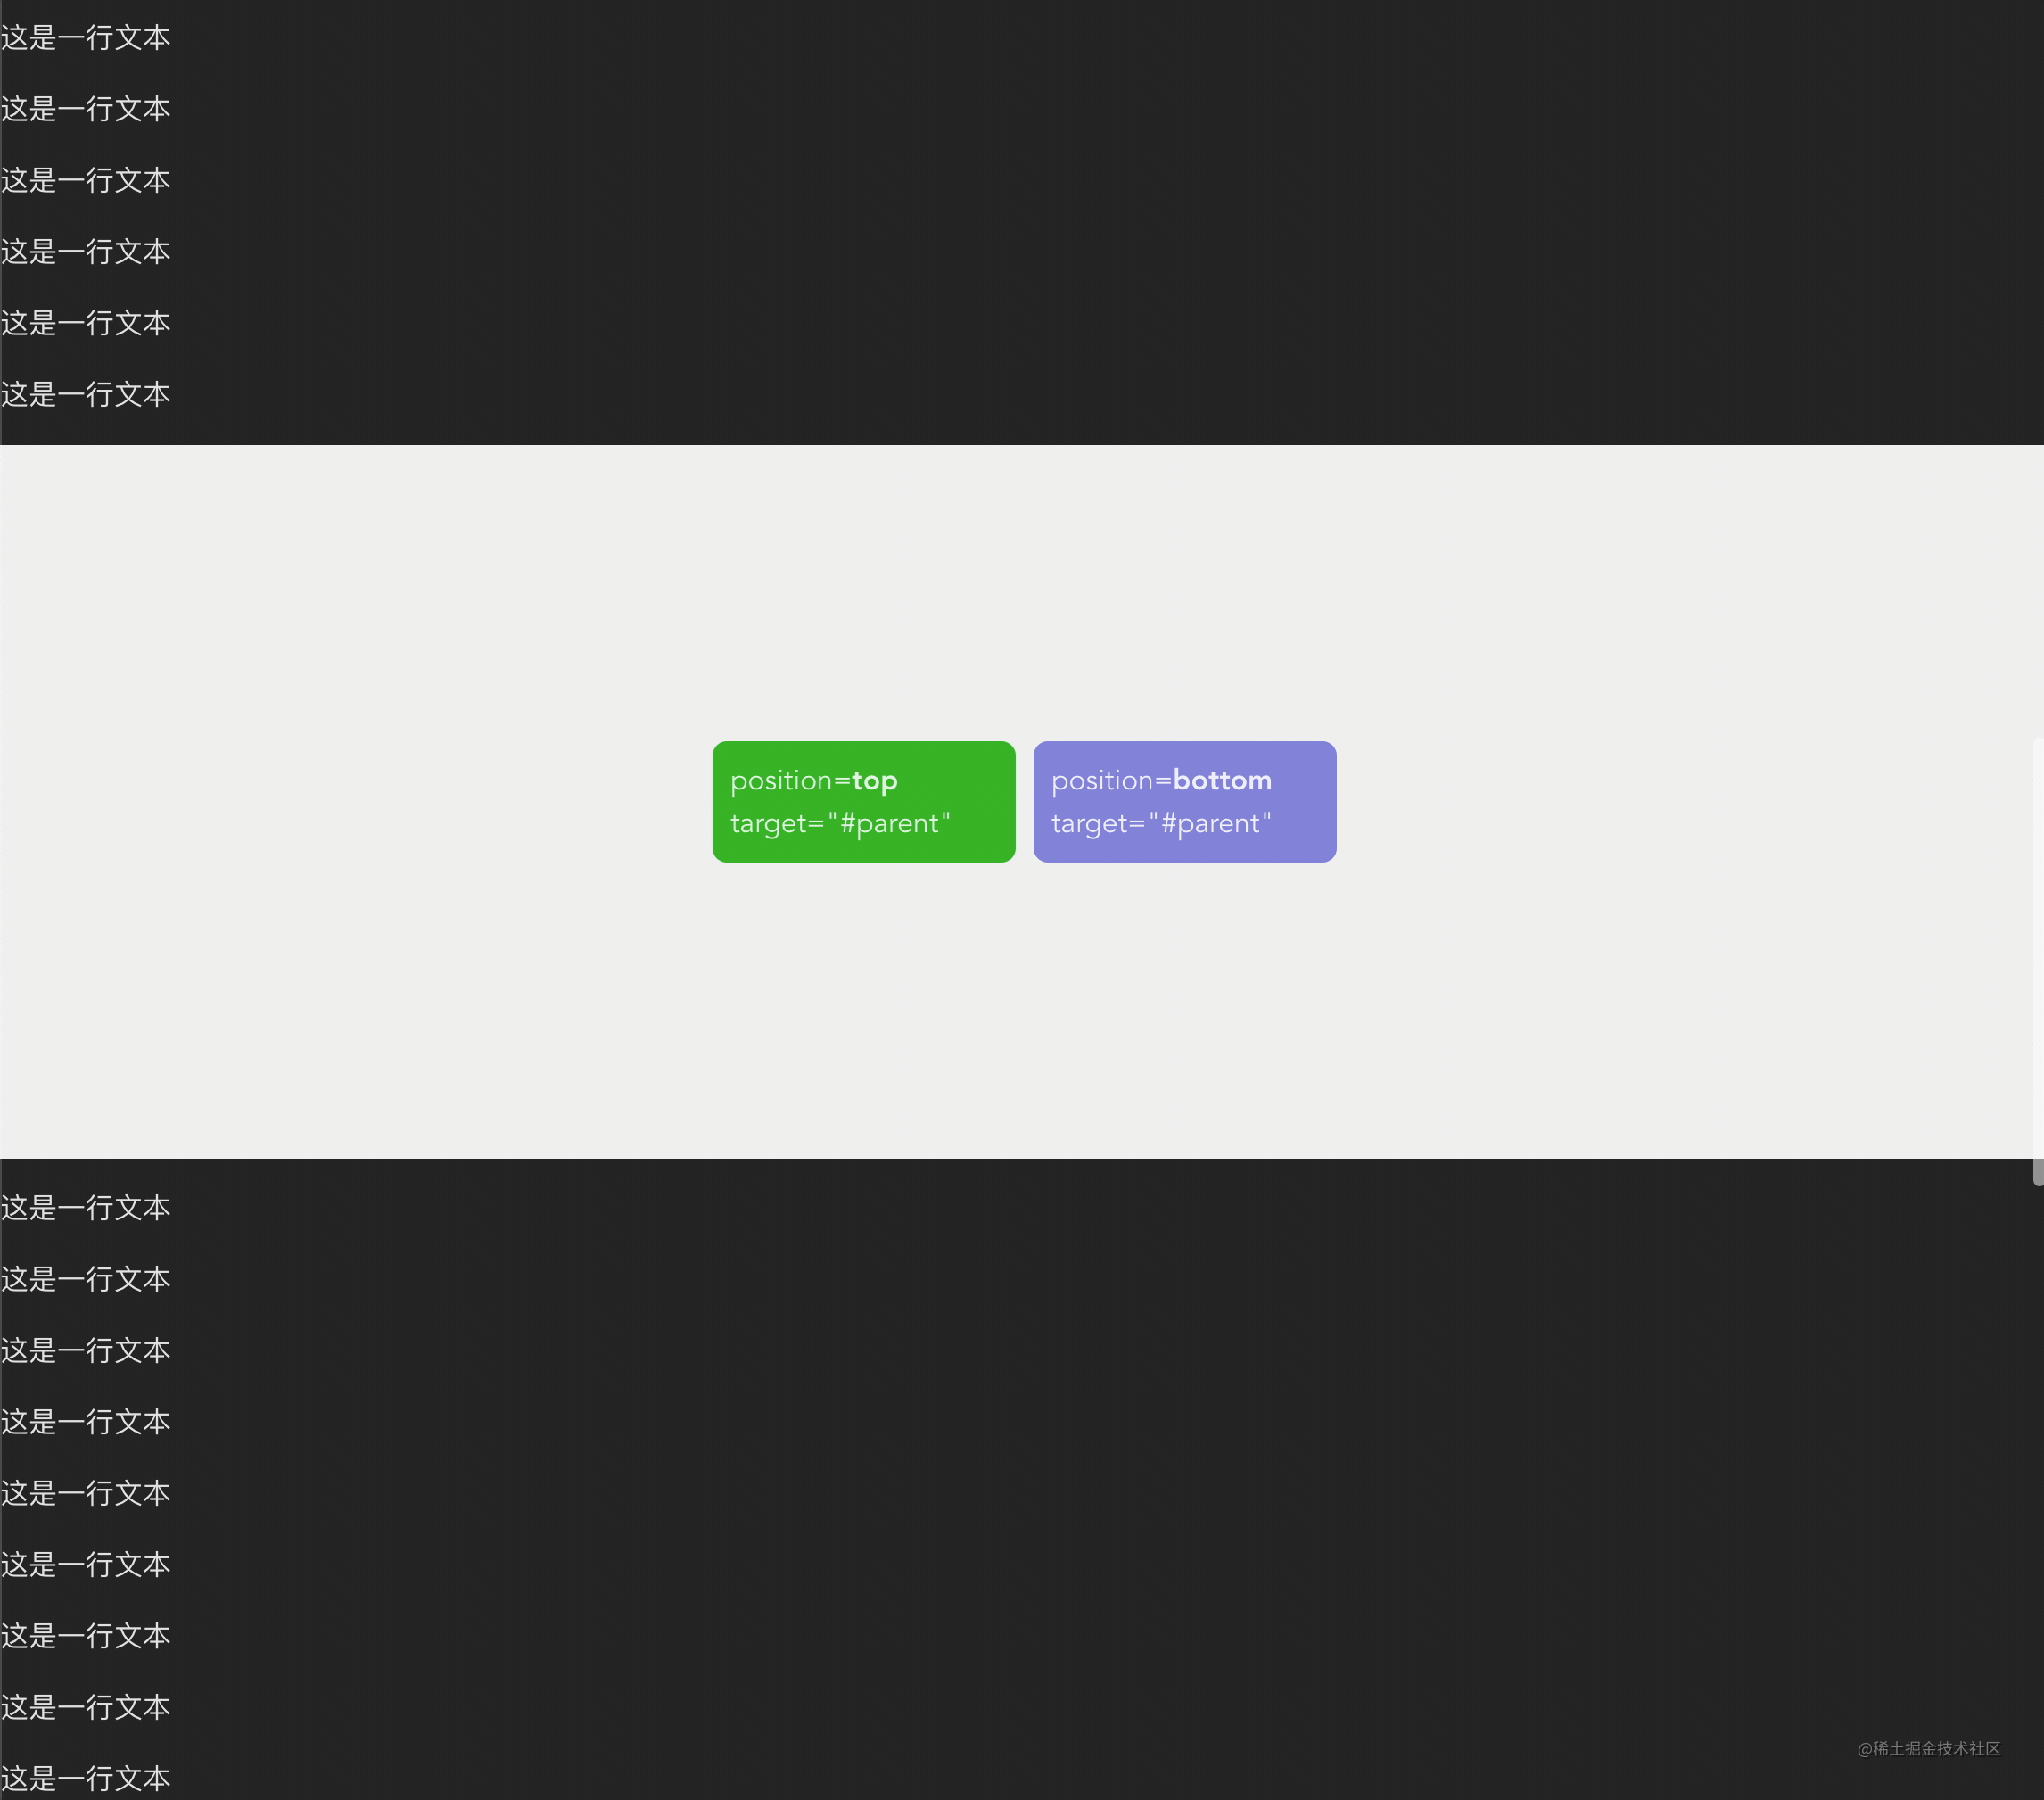
✨ position参数
基于之前的版本我们发现只实现了滚动时目标元素固定到顶部,接下来加入 position参数属性让目标元素能够根据传入的position= top | bottom来进行定位顶部固定或者底部固定
const props = withDefaults(
  defineProps<{
    offset?: number
    // 新增position参数
    position?: 'top' | 'bottom'
  }>(),
  { offset: 0, position: 'top' },
)
回到update方法中按照之前的写法,我们只是写了position=top的逻辑,继续追加position=bottom的逻辑
const update = () => {
  if (!scrollContainer.value) return
  if (props.position === 'top') {
    fixed.value = props.offset >= rootTop.value
  } else {
    // position: bottom情况
    // 当目标元素的rootBottom(底部位置) > 窗口高度 - 目标元素偏移量
    fixed.value = windowHeight.value - props.offset < rootBottom.value
  }
}
与此同时在affixStyle根据传入的position=bottom对其bottom进行设置
const affixStyle = computed<CSSProperties>(() => {
  if (!fixed.value) return {}
  return {
    width: `${rootWidth.value}px`,
    height: `${rootHeight.value}px`,
    top: props.position === 'top' ? `${props.offset}px` : '',
    bottom: props.position === 'bottom' ? `${props.offset}px` : '',
  }
})
这样就完成了position根据top | bottom固定功能,具体代码可以查看 feat-position分支
✨ target参数
到目前为止的实现基本上能够满足基本需求,但有是有业务会希望目标元素在固定之后,在父容器(⚠非滚动)从窗口即将消失时,目标元素也能够过渡恢复状态,基于这个需求,我们新增target:在指定父容器消失之后,其目标元素也希望跟着取消 fixed 状态。
开始我们的实现:
- 定义
target(父容器的css选择器)⚠ 非滚动容器
const props = withDefaults(
  defineProps<{
    offset?: number
    position?: 'top' | 'bottom'
    // 注意:target不可以为滚动容器
    target?: string
  }>(),
  { offset: 0, position: 'top', target: '' },
)
- 在
onMounted内通过target选择器去获取父容器
onMounted(() => {
  //...
  if (props.target) {
    target.value = document.querySelector < HTMLElement > props.target ?? undefined
    if (!target.value) {
      throw new Error('Target is not existed')
    }
  } else {
    // 如果没有默认设置为document.documentElement
    target.value = document.documentElement
  }
})
- 在
watchEffect(update)方法中判断是否存在父容器,有的话相应添加fixed逻辑及其过渡,对于没有设置props.target逻辑实际上不变,设置props.target主要是基于前者追加对props.target的位置信息targetRect进行判断,从而设置fixed状态和平滑过渡
实现拆分
position=top情况
fixed状态条件 :
①.props.offset > rootTop.value:和没有设置target相同
②.targetRect.bottom.value > 0: target(父容器)必须在可视窗口内,即 targetRect.bottom 如果小于 0 则意味着父容器从可视窗口顶部消失,这是就要取消掉 fixed 状态
const update = () => {
  // ...
  if (props.position === 'top') {
    if (props.target) {
      // fixed状态条件
      fixed.value = props.offset > rootTop.value && targetRect.bottom.value > 0
    } else {
      // 不存在target的情况
      fixed.value = props.offset >= rootTop.value
    }
  } else {
    fixed.value = windowHeight.value - props.offset < rootBottom.value
  }
}
通过以上实现我们预览一下会发现,当父容器逐渐离开时目标元素没有平滑过渡离开,显然我们还要实现如何达到过渡效果
position=top情况
目标元素过渡 :父容器底部位置[动态] - 传入的偏移量[常量] - 目标高度[常量]
// 创建 transform变量用来平滑过度值的保存
const transform = ref(0)

const update = () => {
  // ...
  if (props.position === 'top') {
    if (props.target) {
      // fixed判断
      fixed.value = props.offset > rootTop.value && targetRect.bottom.value > 0
      // 目标元素过渡计算:父容器底部位置 - 传入的偏移量 - 目标高度
      // 父容器底部在滚动时位置是实时变化,即当每次滚动时他们的差值就是目标元素过渡值
      const difference = targetRect.bottom.value - props.offset - rootHeight.value
      // 保存平滑过渡值,将其设置到affixStyle transform的translateY值
      transform.value = difference < 0 ? difference : 0
    }
    // ...
  }
}
我们将保存的transform值设置到affixStyle中,这样我们就完成position=top且存在 target(父容器)的情况下目标元素固定的逻辑, 以下是实现效果
const affixStyle = computed<CSSProperties>(() => {
  return {
    // ...
    transform: transform.value ? `translateY(${transform.value}px)` : '',
  }
})
对于position=bottom情况下也是基于没有设置props.target的条件下,追加一些条件
position=bottom
fixed状态条件 :
①.windowHeight.value - props.offset < rootBottom.value:和没有设置target相同
②.windowHeight.value > targetRect.top.value: target(父容器)必须在可视窗口内,即 targetRect.top 如果大于可视窗口高度(windowHeight) 则意味着父容器从可视窗口底部消失,这时取消掉fixed状态
const update = () => {
  // ...
  if (props.position === 'top') {
    // 省略....
  } else if (props.target) {
    // position: bottom 有target
    // 窗口高度 - 传入的偏移量 < 目标元素的底部位置 且 父容器顶部位置小于窗口高度时fixed
    fixed.value =
      windowHeight.value - props.offset < rootBottom.value &&
      windowHeight.value > targetRect.top.value
  } else {
    // position: bottom 不存在target的情况
    // 窗口高度 - 传入的偏移量 < 目标元素的底部位置
    fixed.value = windowHeight.value - props.offset < rootBottom.value
  }
}
position=bottom情况
目标元素过渡 :可视窗口高度[常量] - 父容器顶部位置top[动态] - 传入的偏移量[常量] - 目标元素的高度[常量]
const update = () => {
  if (!scrollContainer.value) return
  if (props.position === 'top') {
    // ...
  } else if (props.target) {
    // ...
    const difference = windowHeight.value - targetRect.top.value - props.offset - rootHeight.value
    transform.value = difference < 0 ? -difference : 0
  }
  // ...
}
完成效果
现在我们就实现完 target 参数的设置啦,具体代码可以查看 feat-target分支
其余API
目前已经基本完成了element-plus Affix组件的核心功能,剩余的API比较简单我们也一一实现一下:
事件
change
当fixed状态改变时触发,同时返回fixed状态
scroll
监听滚动容器并返回scrollTop和fixed状态
实现
根据事件所描述的我们要实现以下几点:
- 定义
emit事件:change,scroll - 监听
scrollContainer滚动:实时获取scrollContainer的scrollTop - 监听fixed状态: 通过
watch监听fixed,一旦变更通过emit('change')通知外部
// 定义`emit`事件: `change`,`scroll`
const emit = defineEmits<{
  (event: 'change', fixed: boolean): void
  (event: 'scroll', value: { scrollTop: number; fixed: boolean }): void
}>()
// 监听scrollContainer滚动容器
const handleScroll = () => {
  const scrollTop =
    scrollContainer.value instanceof Window
      ? document.documentElement.scrollTop
      : scrollContainer.value?.scrollTop
  emit('scroll', { fixed: fixed.value, scrollTop: scrollTop || 0 })
}
useEventListener(scrollContainer, 'scroll', handleScroll)
// 监听fixed状态并通知
watch(fixed, (v) => emit('change', v))
外部方法
update
手动更新固钉状态,这就比较简单了,用到defineExpose对外暴露update方法即可
Affix组件内部
defineExpose({ update })
外部组件:
// 因为这里使用的是typescript,通过使用`InstanceType<typeof Affix>`
// 能够获取affixRef所暴露的方法,具体可查看vue官方文档描述
// https://staging-cn.vuejs.org/guide/typescript/composition-api.html#typing-component-template-refs
const affixRef = shallowRef<InstanceType<typeof Affix> | null>(null)
// affixRef.value?.update()
<Affix ref="affixRef"><div>11</div></Affix>
总结
经过对参数,时间,外部方法的逐步实现,希望可以让你深入了解element-plus的affix,在其使用的同时能够快速定位问题所在,还可以在不依赖element-plus也能够自己实现该组件。
由于本人也是新手一个,如果在分析有什么错误还望各位朋友谅解和提出建议